Autumn in the City – Test Paintings and Transfer
This blog is about:
- Creating test paintings until they come out of your ears, and
- a good approach to working with tracing and transfer paper.
Test Paintings
Have you ever had an idea in mind but no clue how to approach it? This can happen if you are trying to paint something that doesn’t exist or it exists but looks very different from the way you want to show it. I found this dilemma with “Autumn in The City”.
The Idea
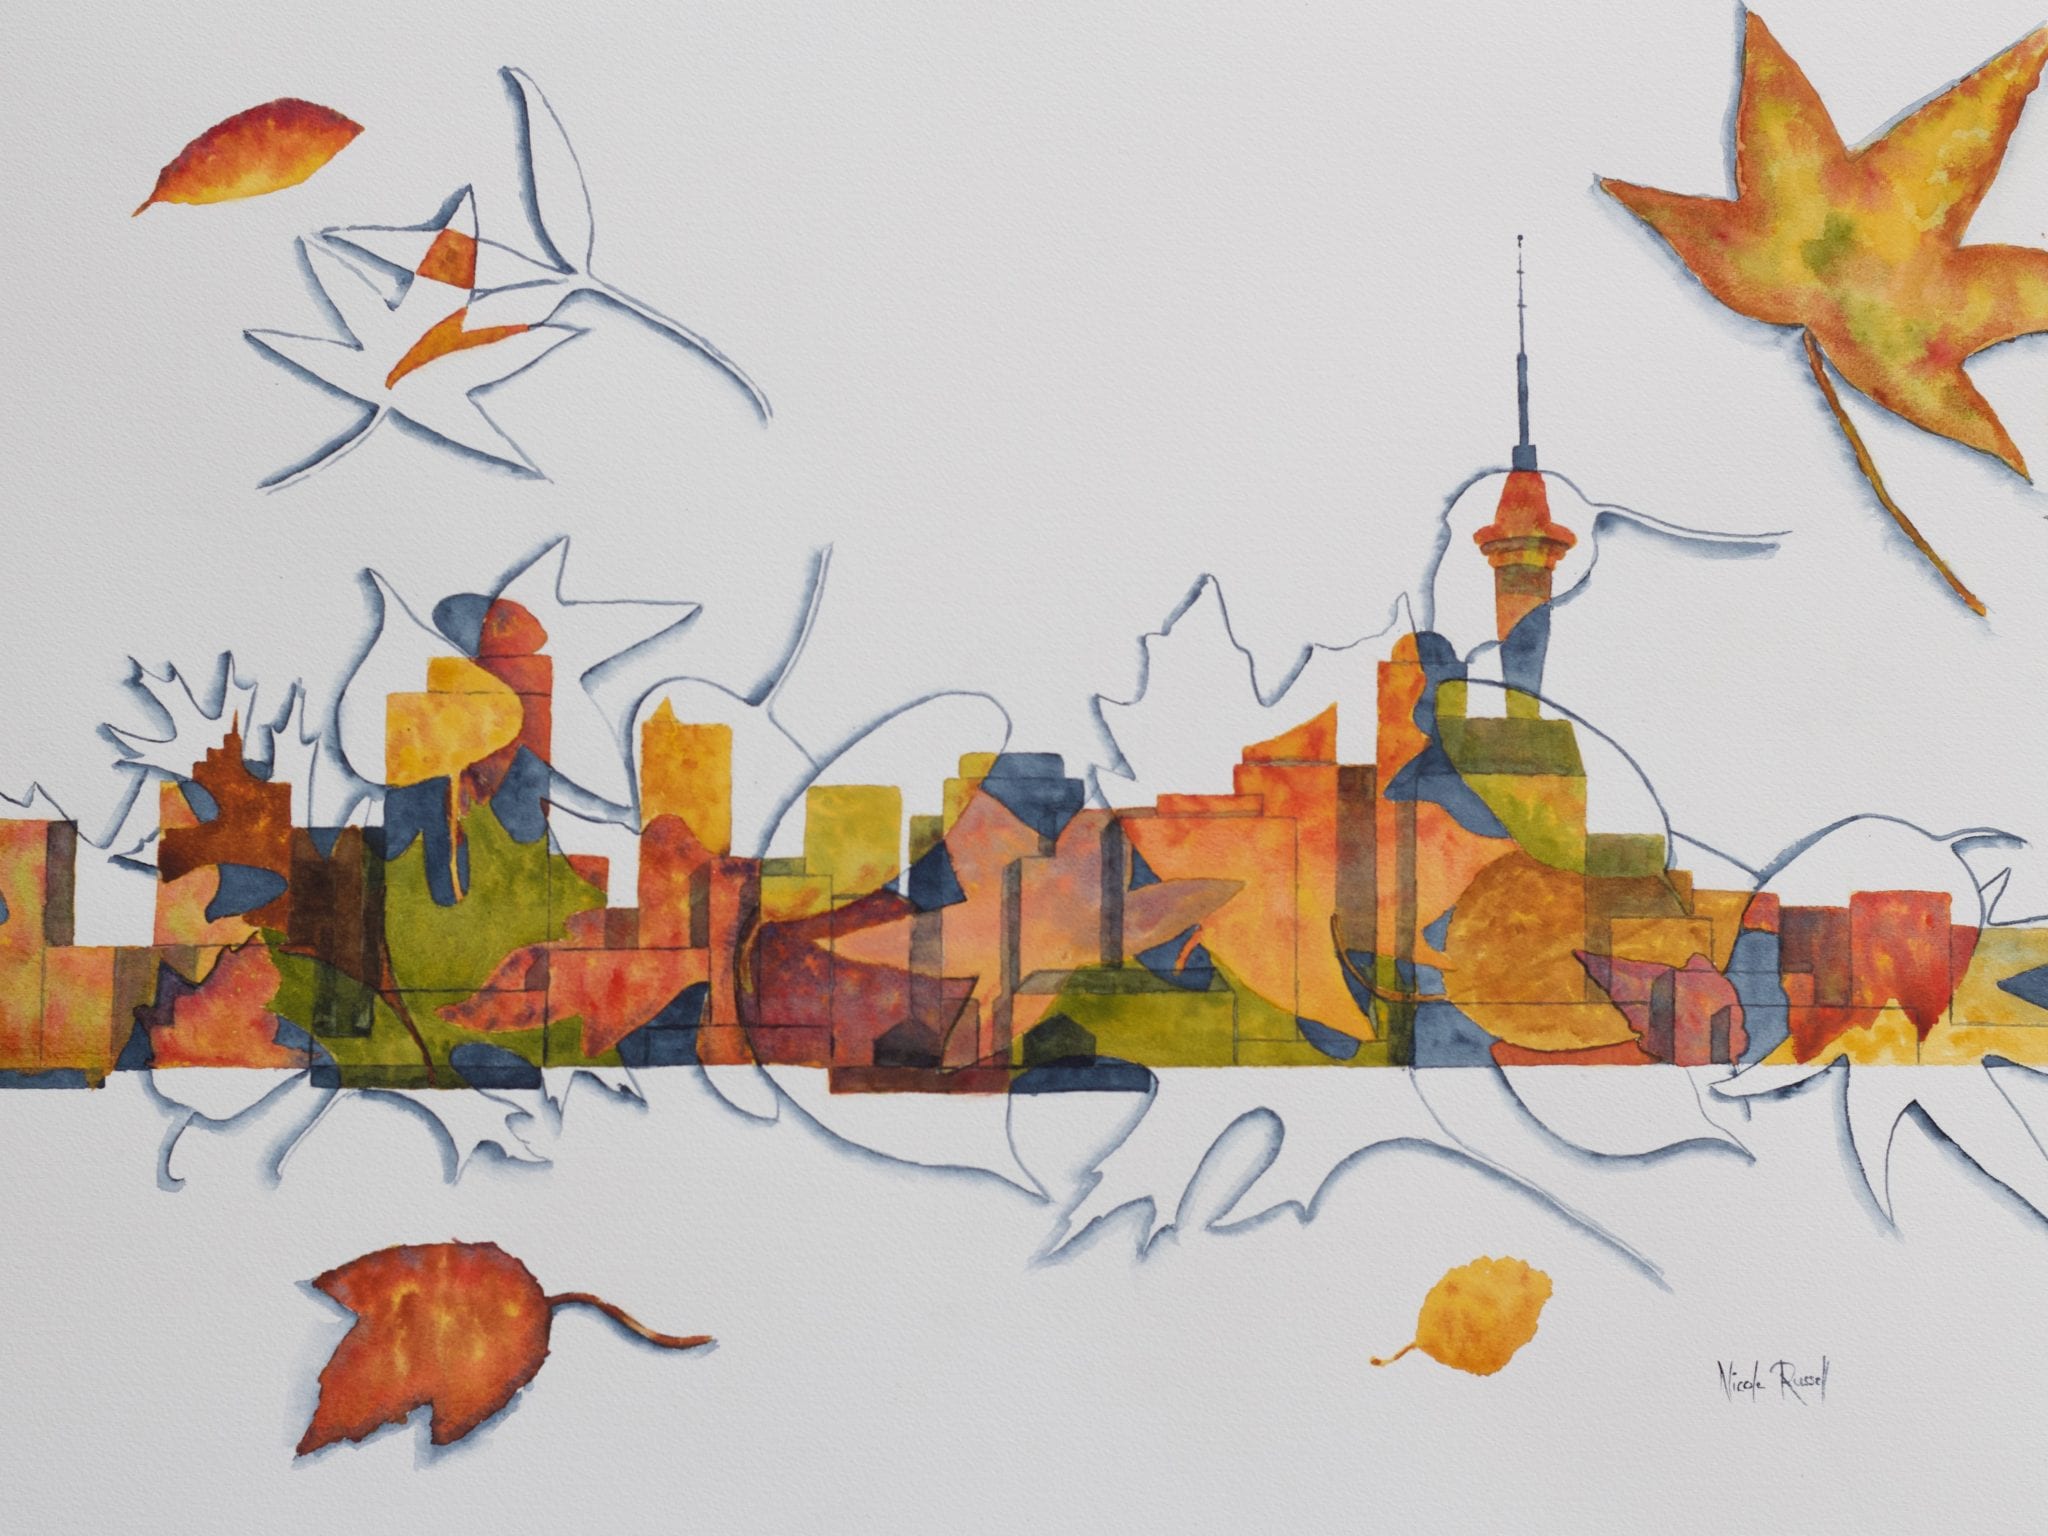
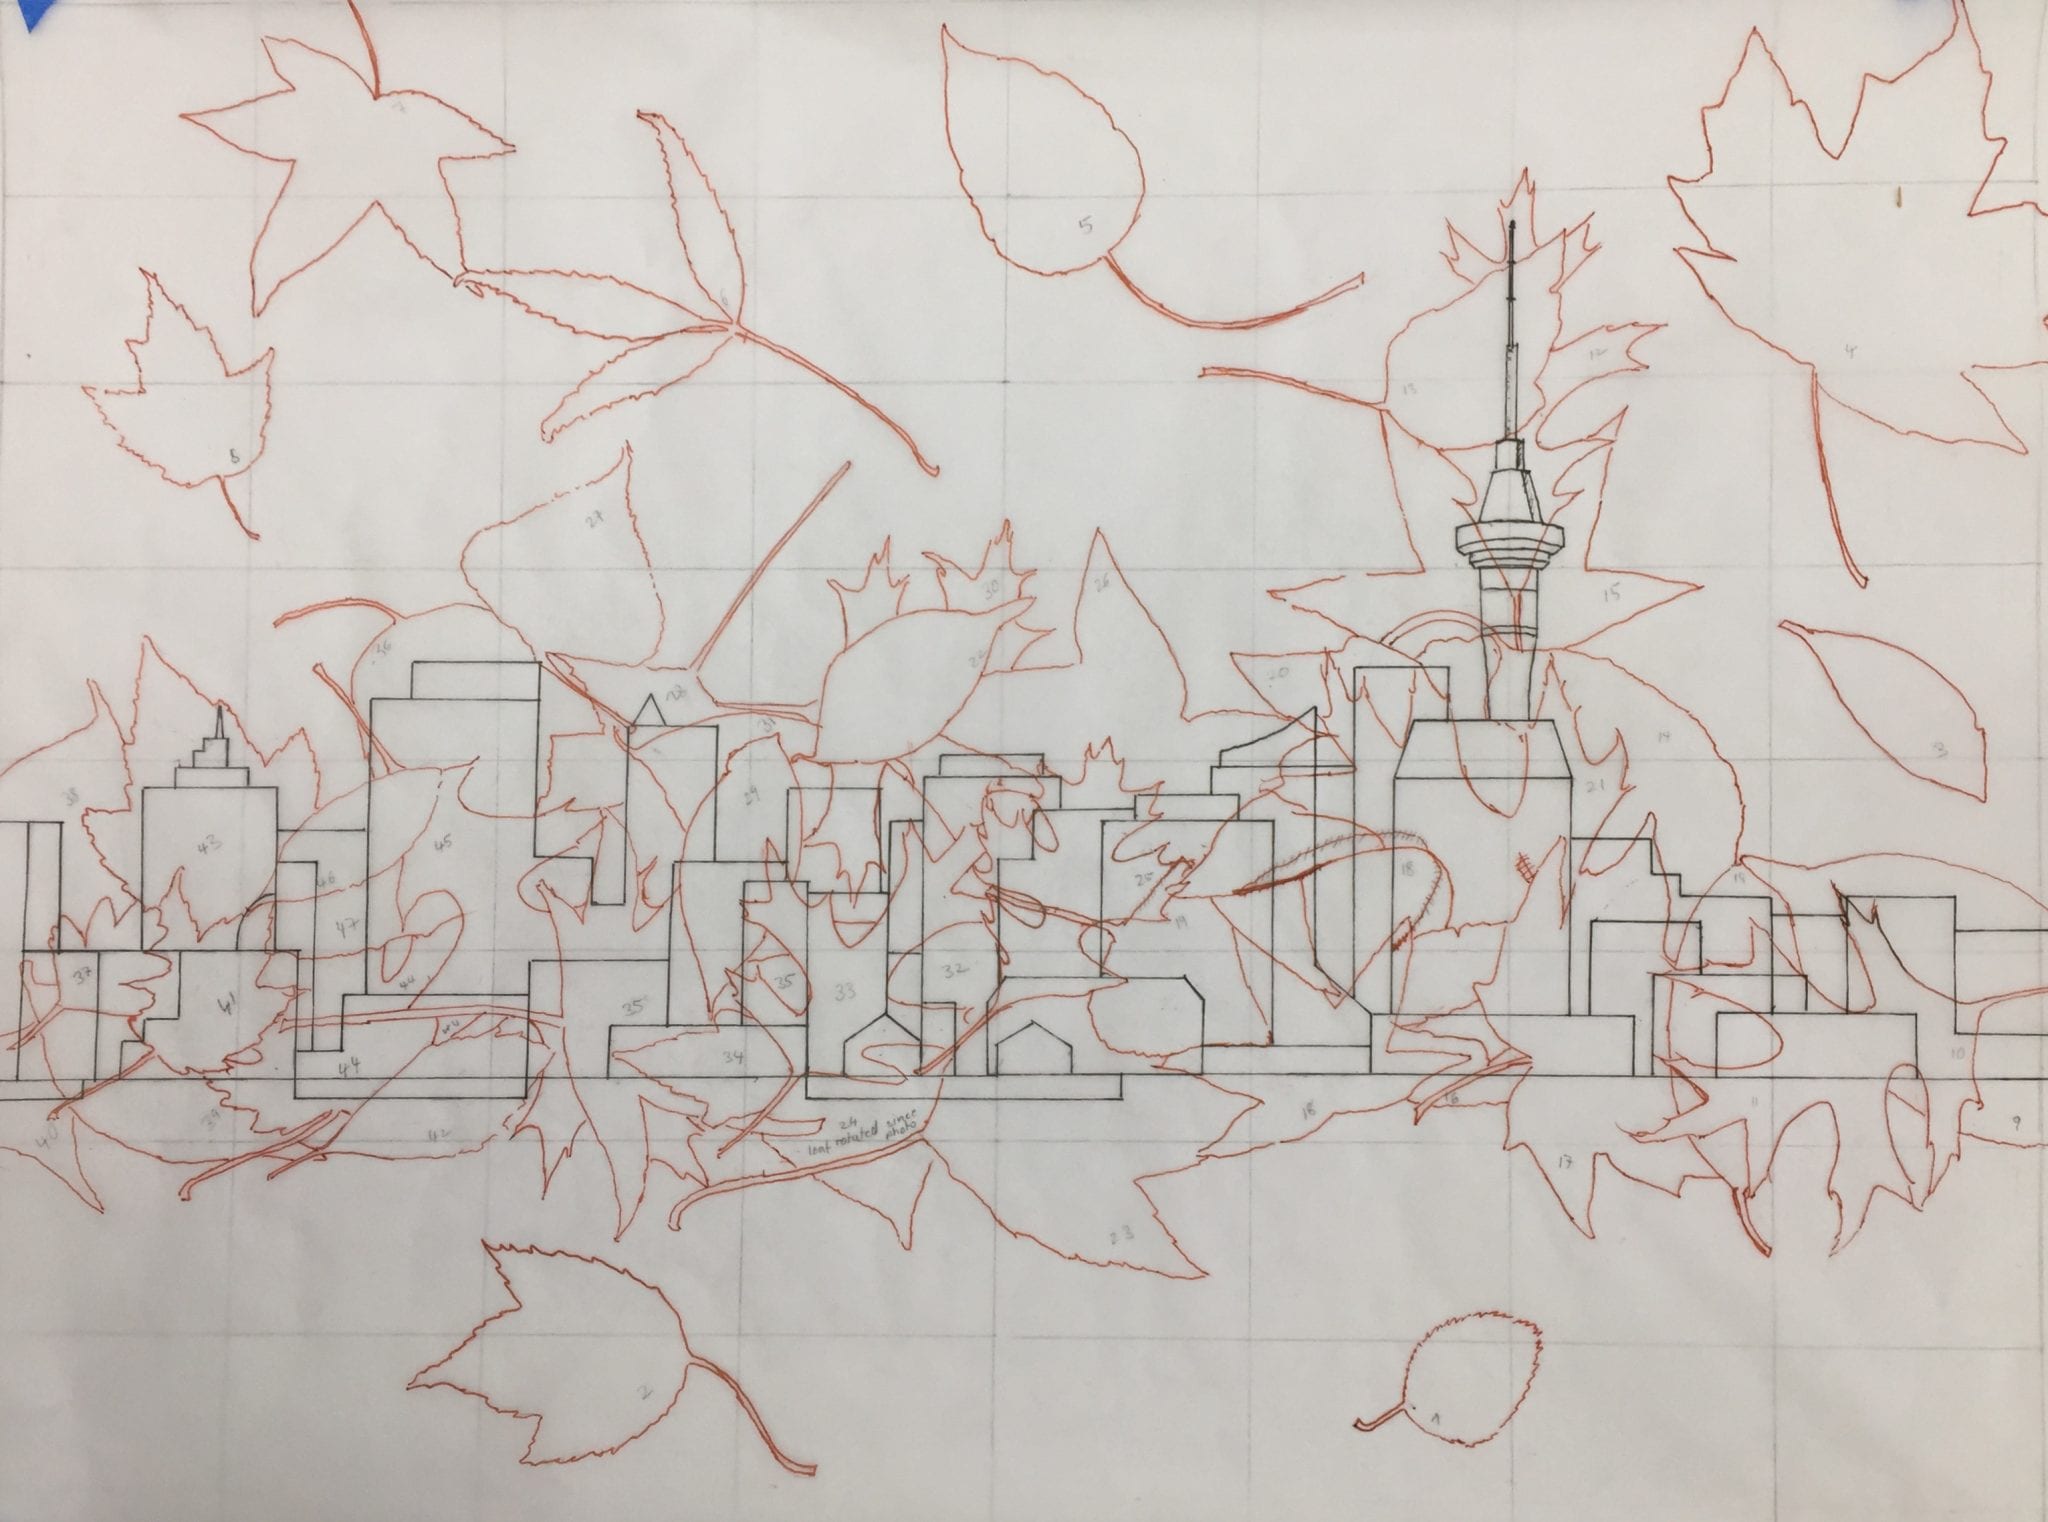
The idea started with the beautiful inspiration of all the autumn colours around me. Then came the thought of bringing the Auckland skyline and autumn together, merging man-made structures with nature, because let’s face it: a city is only beautiful through nature. What would a city be without its trees and parks? A mass of concrete, plaster and bricks, right?! However, I didn’t want to paint a park in a city. So how can I show the idea?

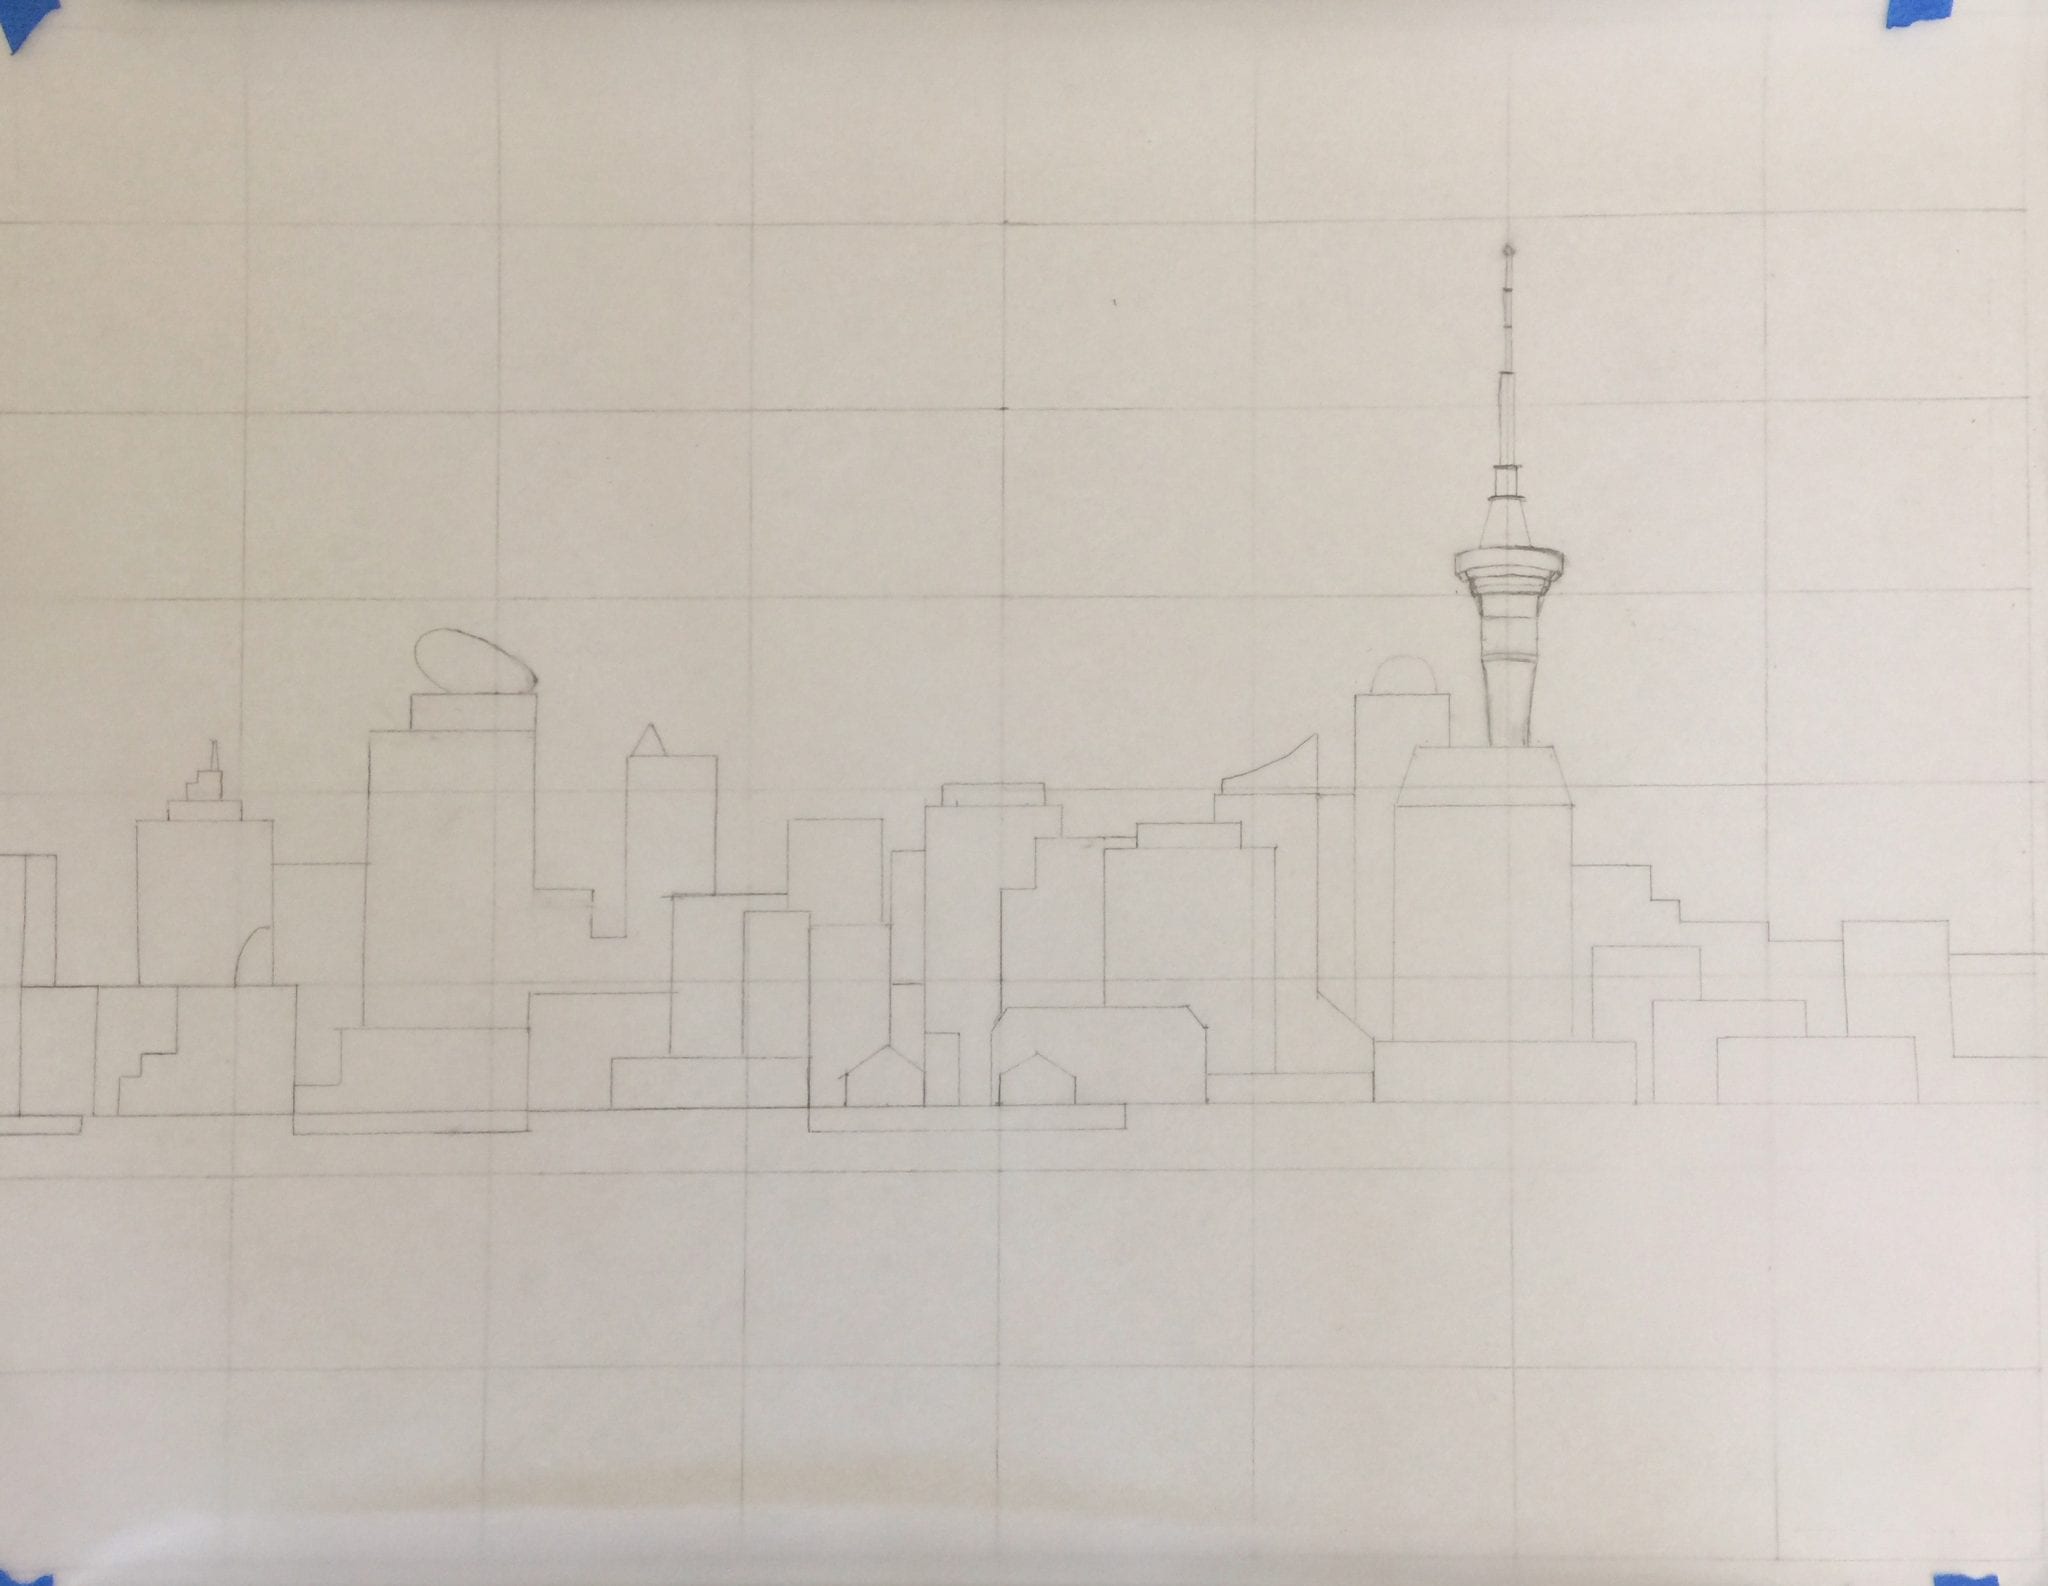
The Sketch
My paintings almost always start with a sketch in my visual diary. In this case the sketch was simple and straight forward. Next I had to figure out how to connect it with autumn.
The Test Paintings
There are two main reasons for doing test paintings before you do your final painting:
- Costs: If you are planning a big painting you may have to pay for a big watercolour sheet (or canvas) and they are not cheap. Imagine you paint big straight away and then realise that your painting doesn’t turn out the way you thought. How disappointing! Now you have wasted a full watercolour sheet plus pigment, but probably gained in experience.
- Time:. A test painting can be a small proportion of the actual painting, like a cutout. My test paintings are around A5-A4 size and I can do several of them in a day. However, I usually work several days or weeks on a big painting. So imagine you do four to five test paintings before you find the right approach versus four to five big size paintings. I would probably give up after the second big painting and be very frustrated.
- Experience: Ok, there is a third point to mention with test paintings: You gain a lot of experience in a very short time. The funny thing with painting experience is that if you work on small artworks and produce a lot of them in a short time, you can remember your successes and failures better. If you work on a big piece over a long period of time, you tend to forget the mistakes you made at the beginning and are likely to do them again. That’s why daily painters improve so incredibly fast in their art.
- Reference Material: Oops, see, I can come up with a fourth good reason for a test painting: You get a great selection of little paintings that might be an inspiration for future artwork. I like to collect all my test paintings in my visual diary and write notes on how I created them. Even the little failures are a good reminder of how not to do things.
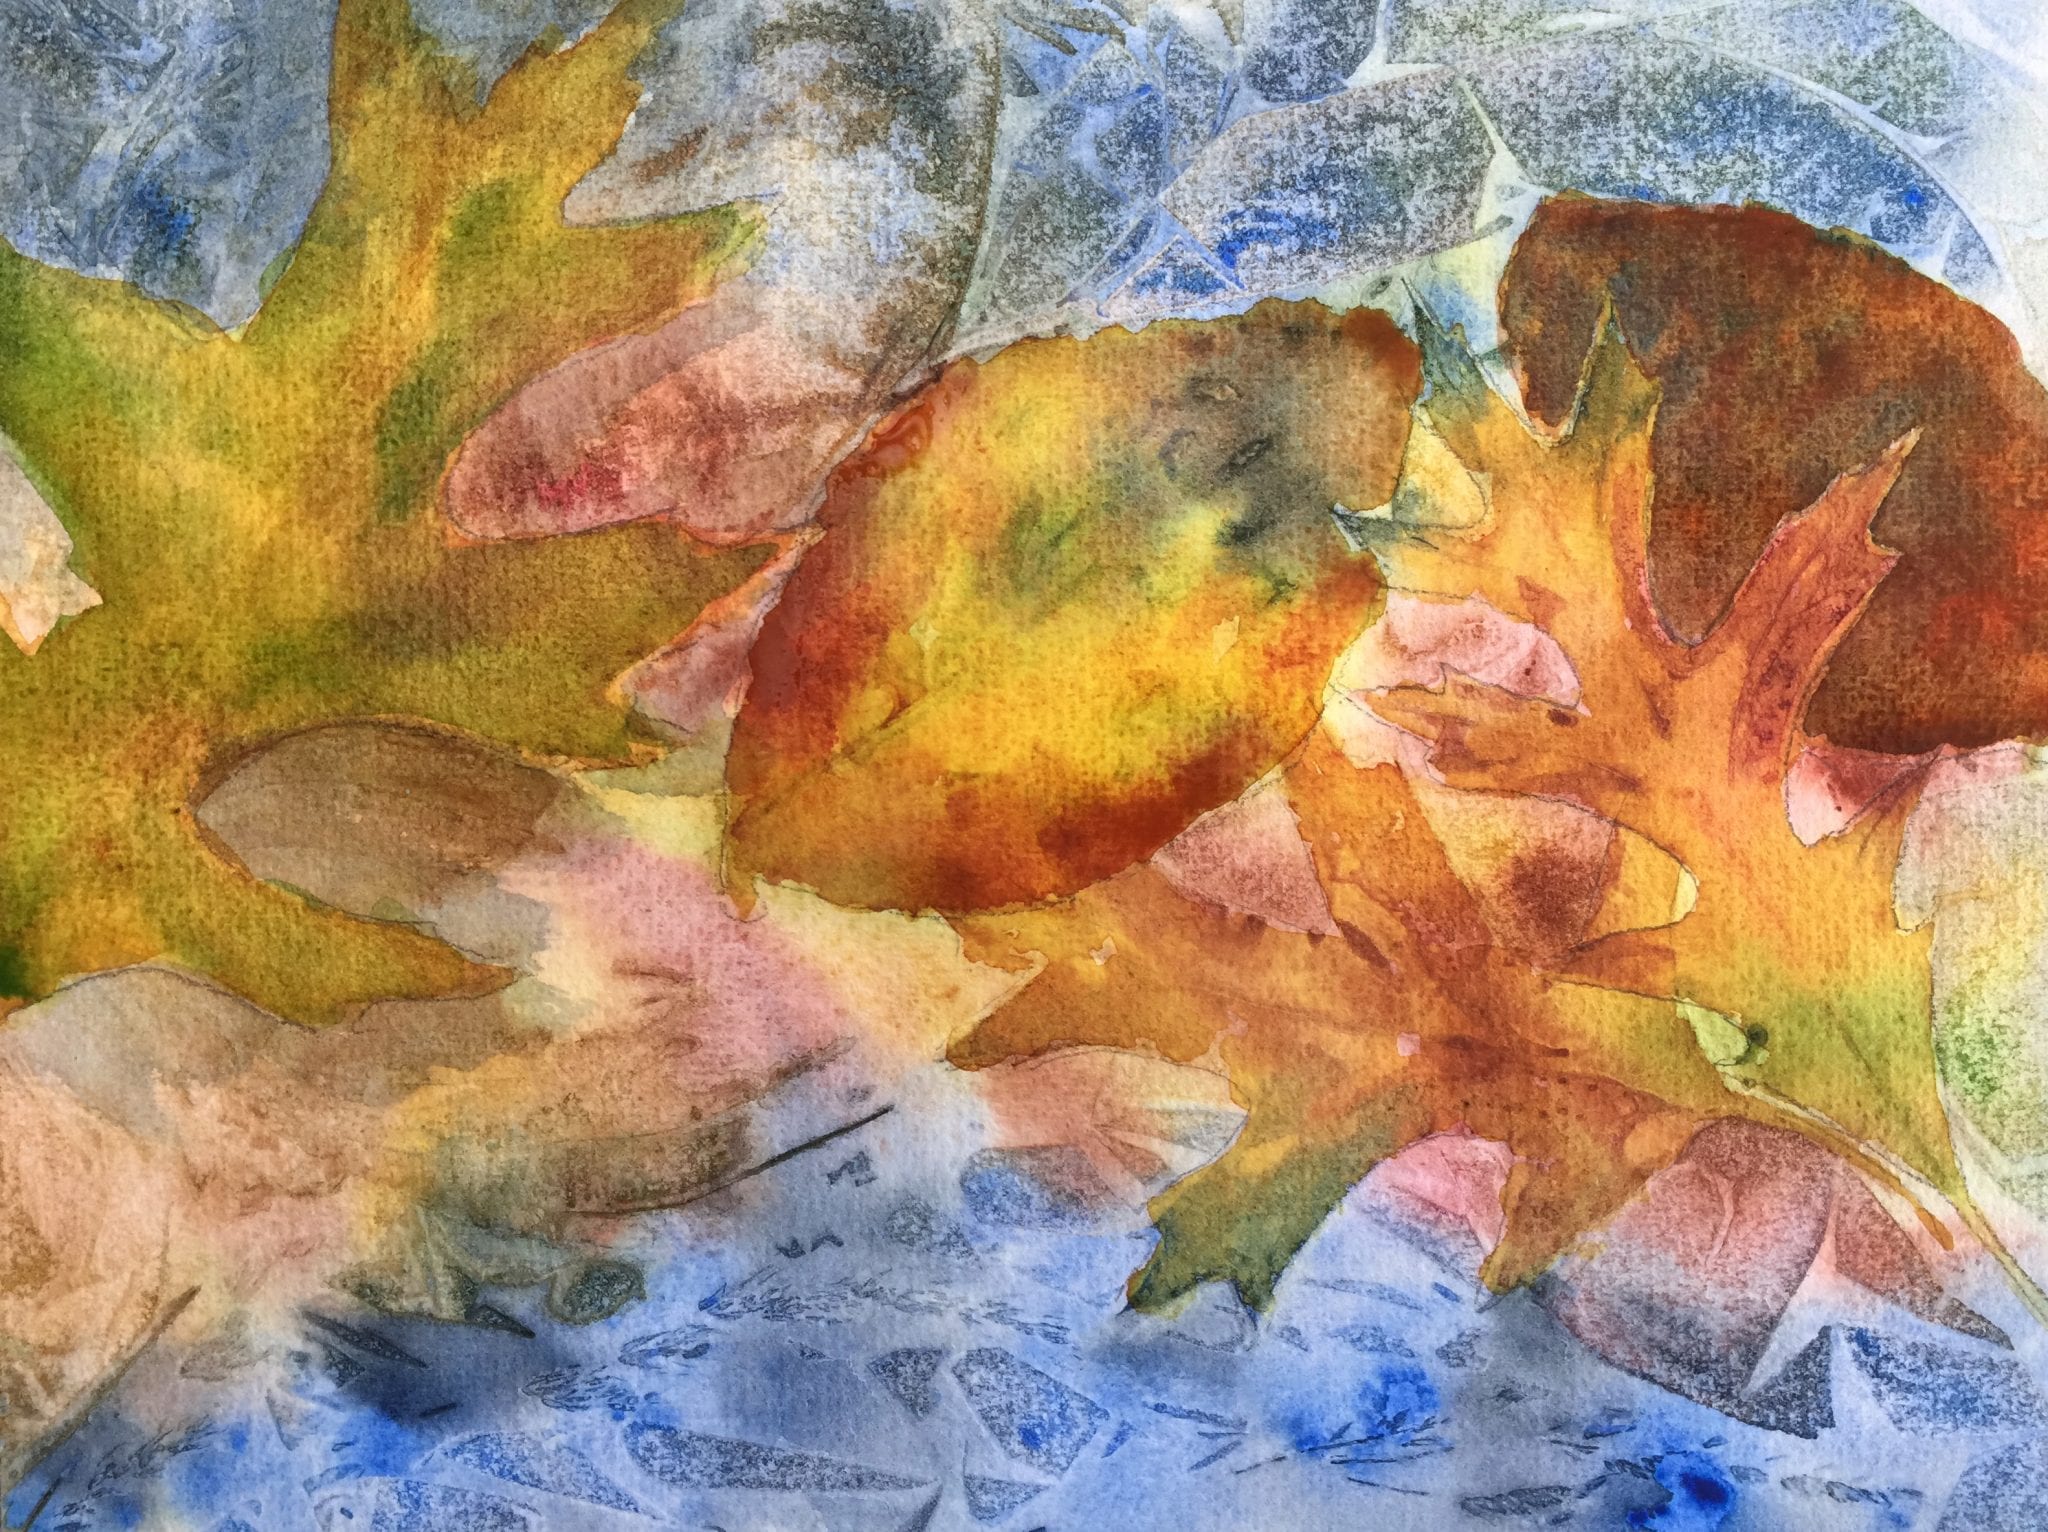
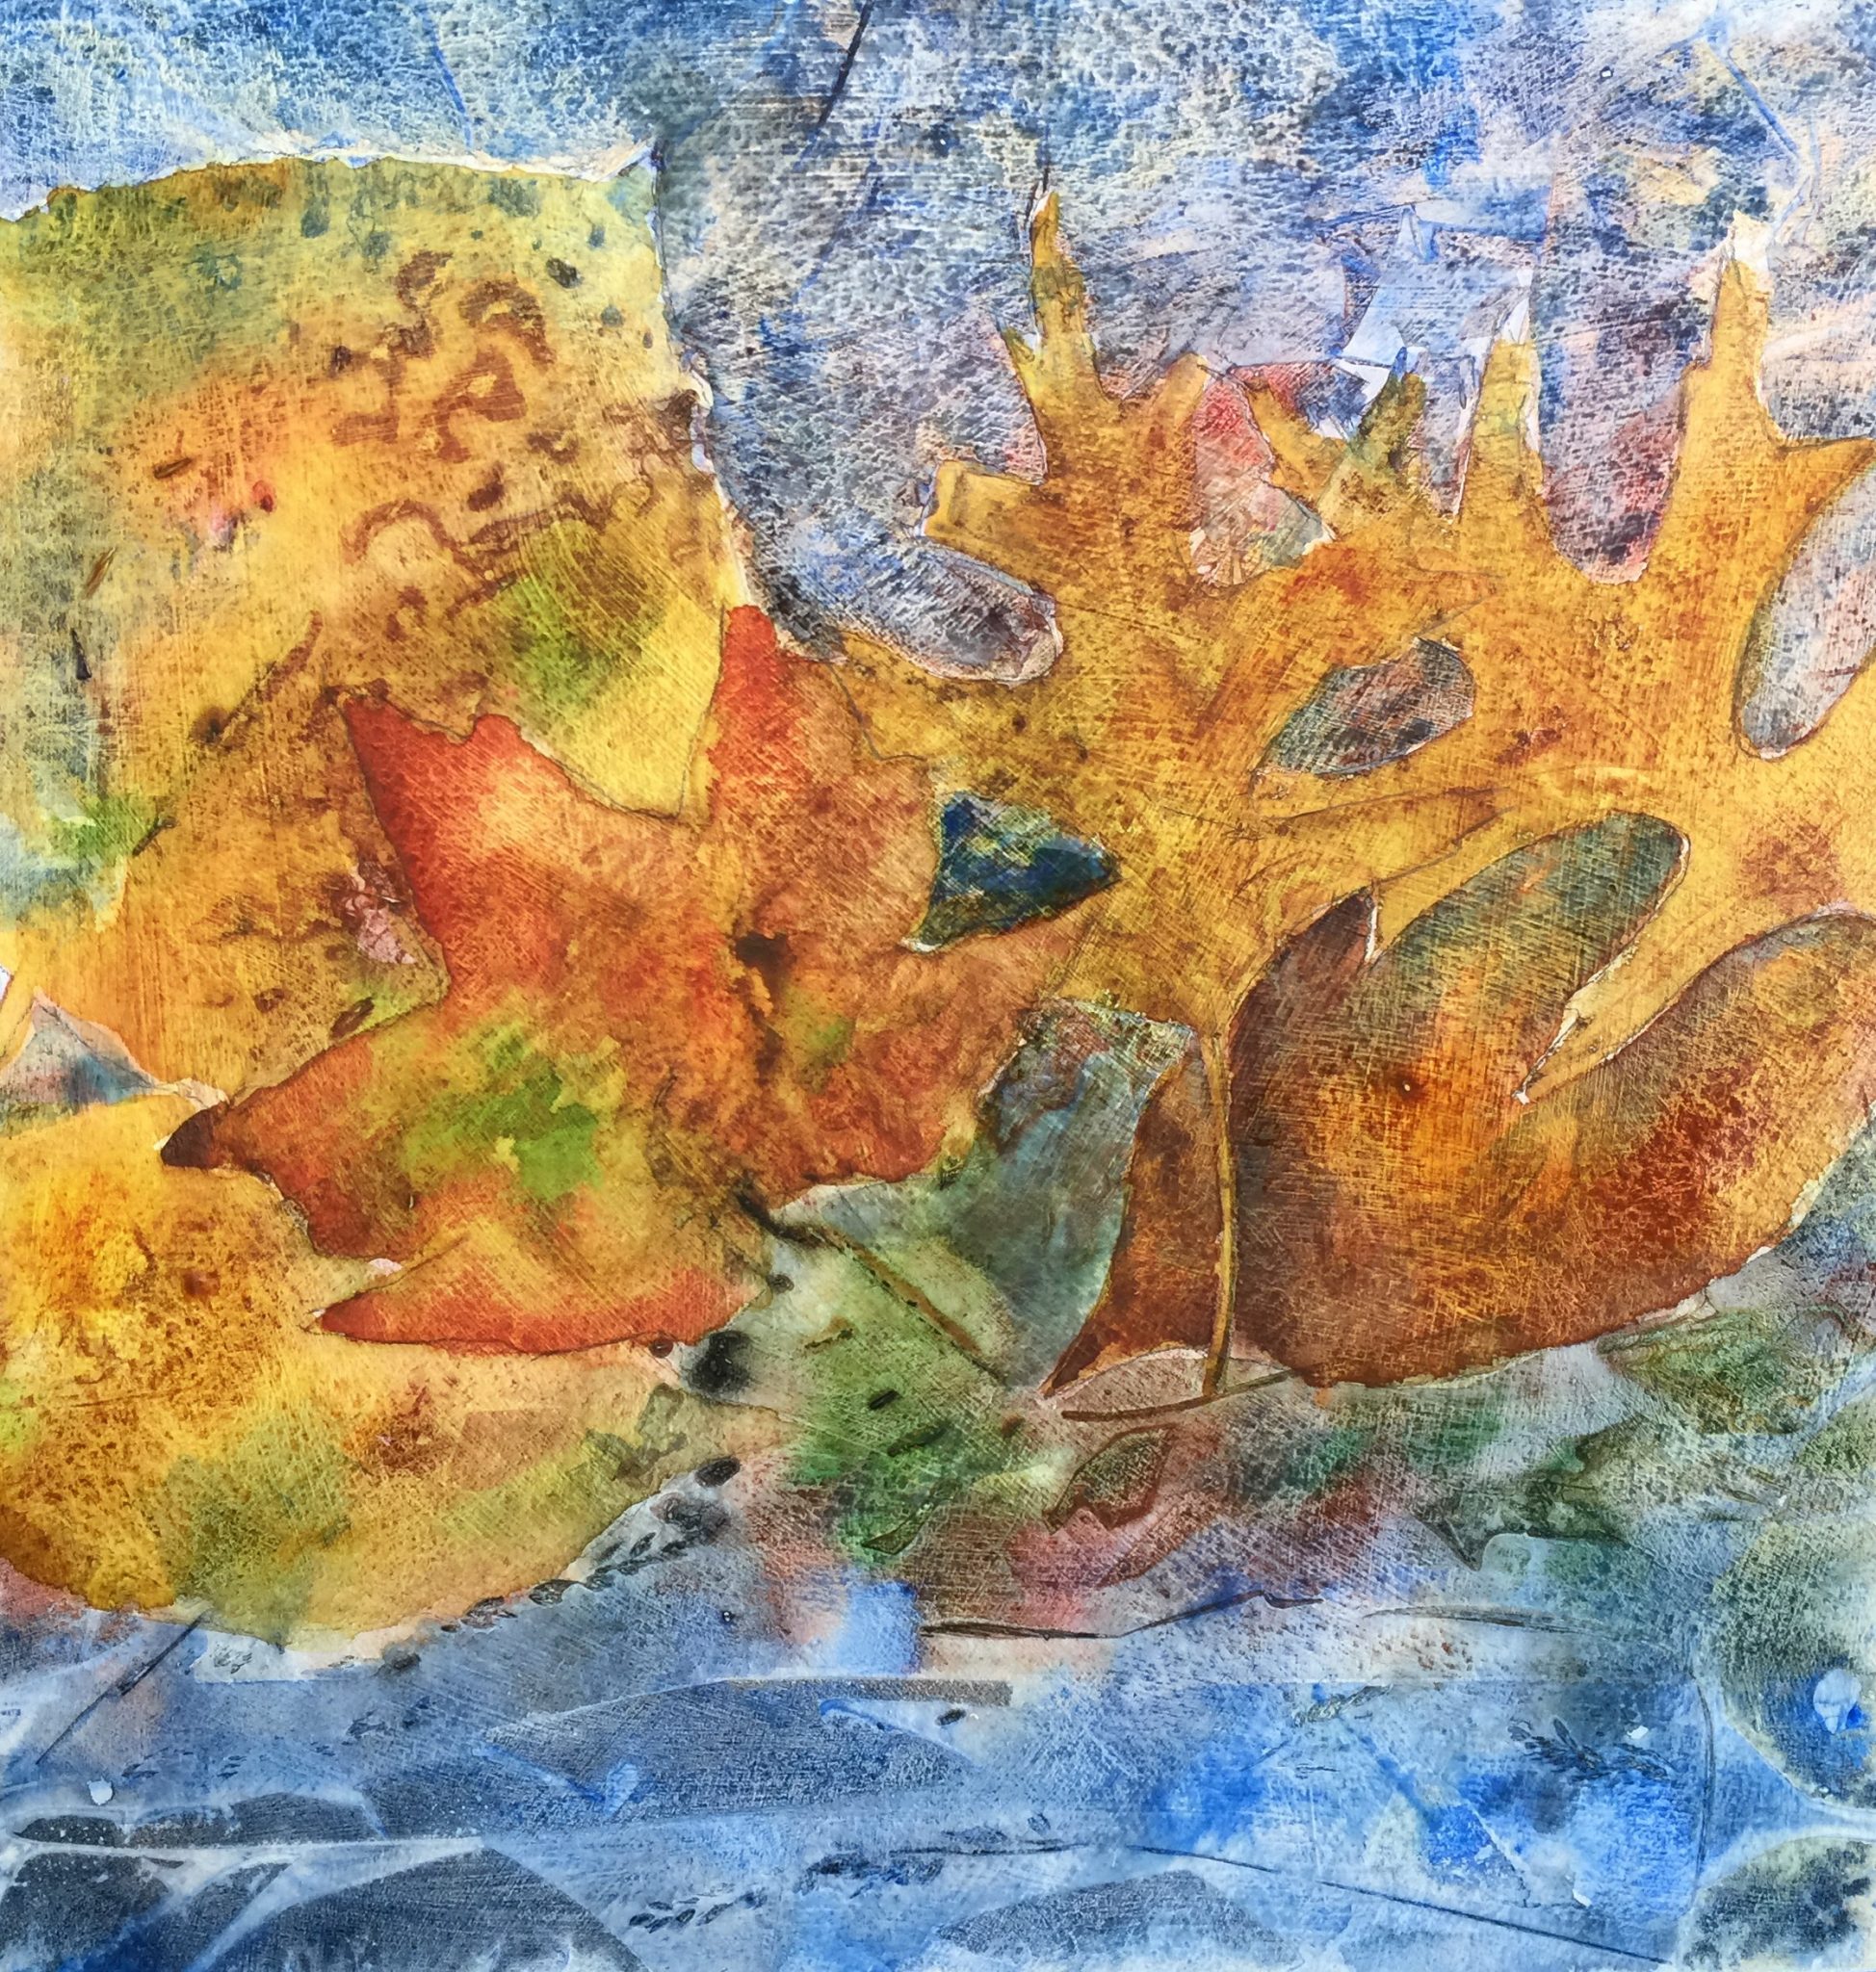
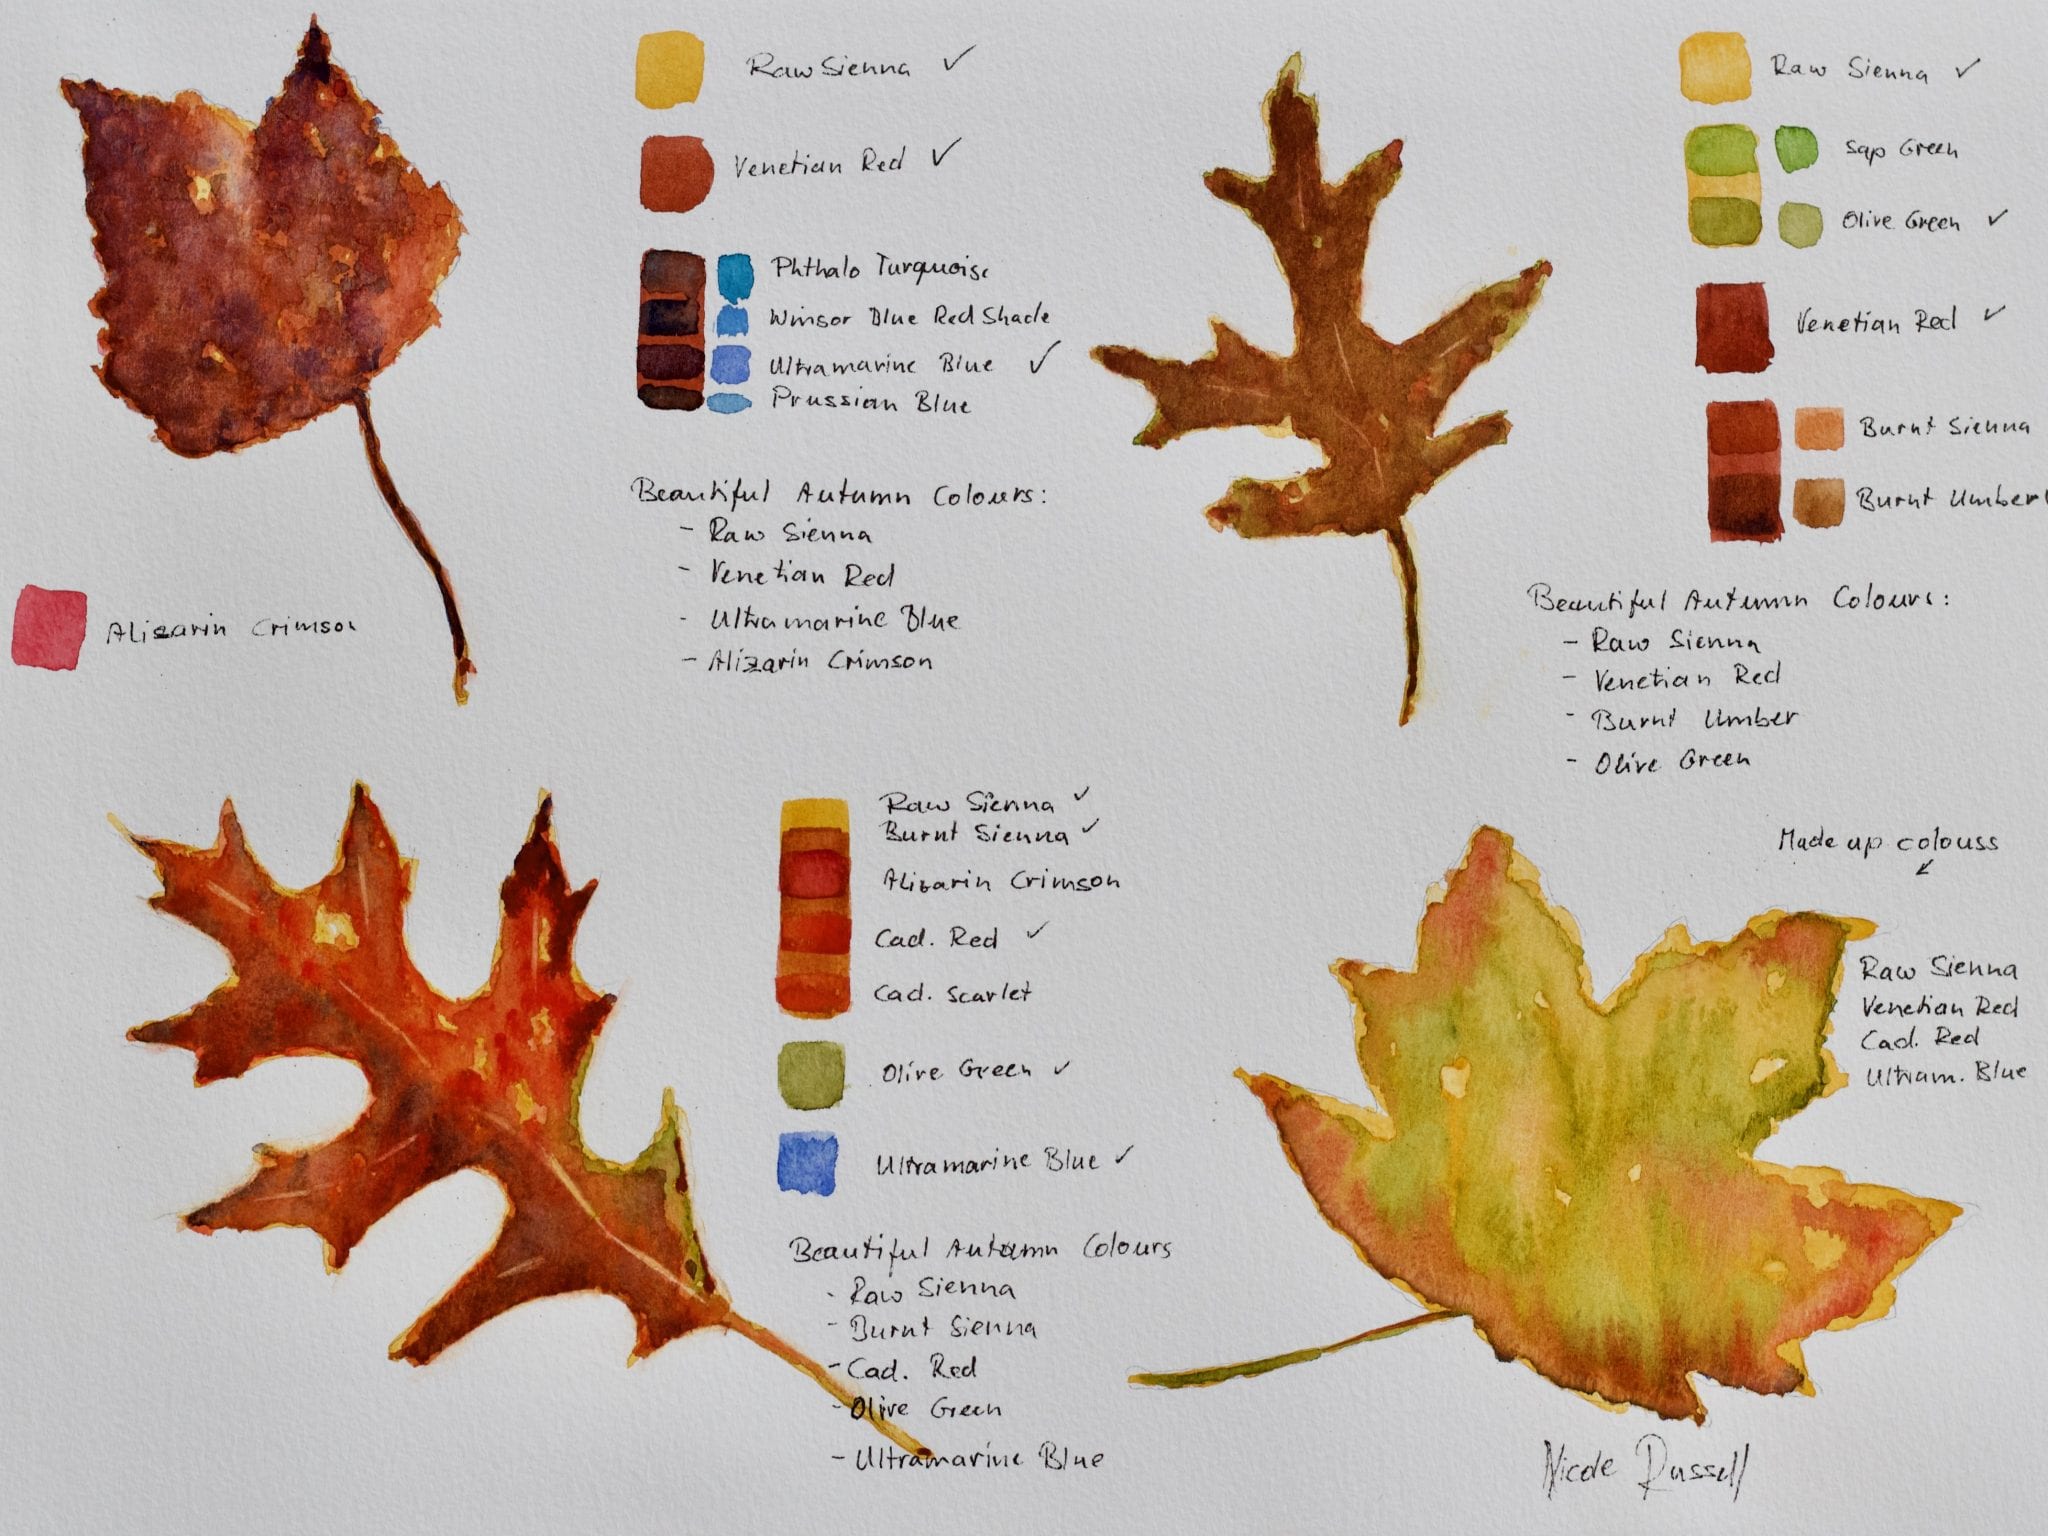
These are my little test paintings for Autumn in The City. First I worked with leave imprints on watercolour paper and on gesso primed paper. As you can already tell, they were a no-go for my final painting. My little leaf exercise painting had some beautiful clarity which I would have liked for my final painting, so I skipped the imprint idea.
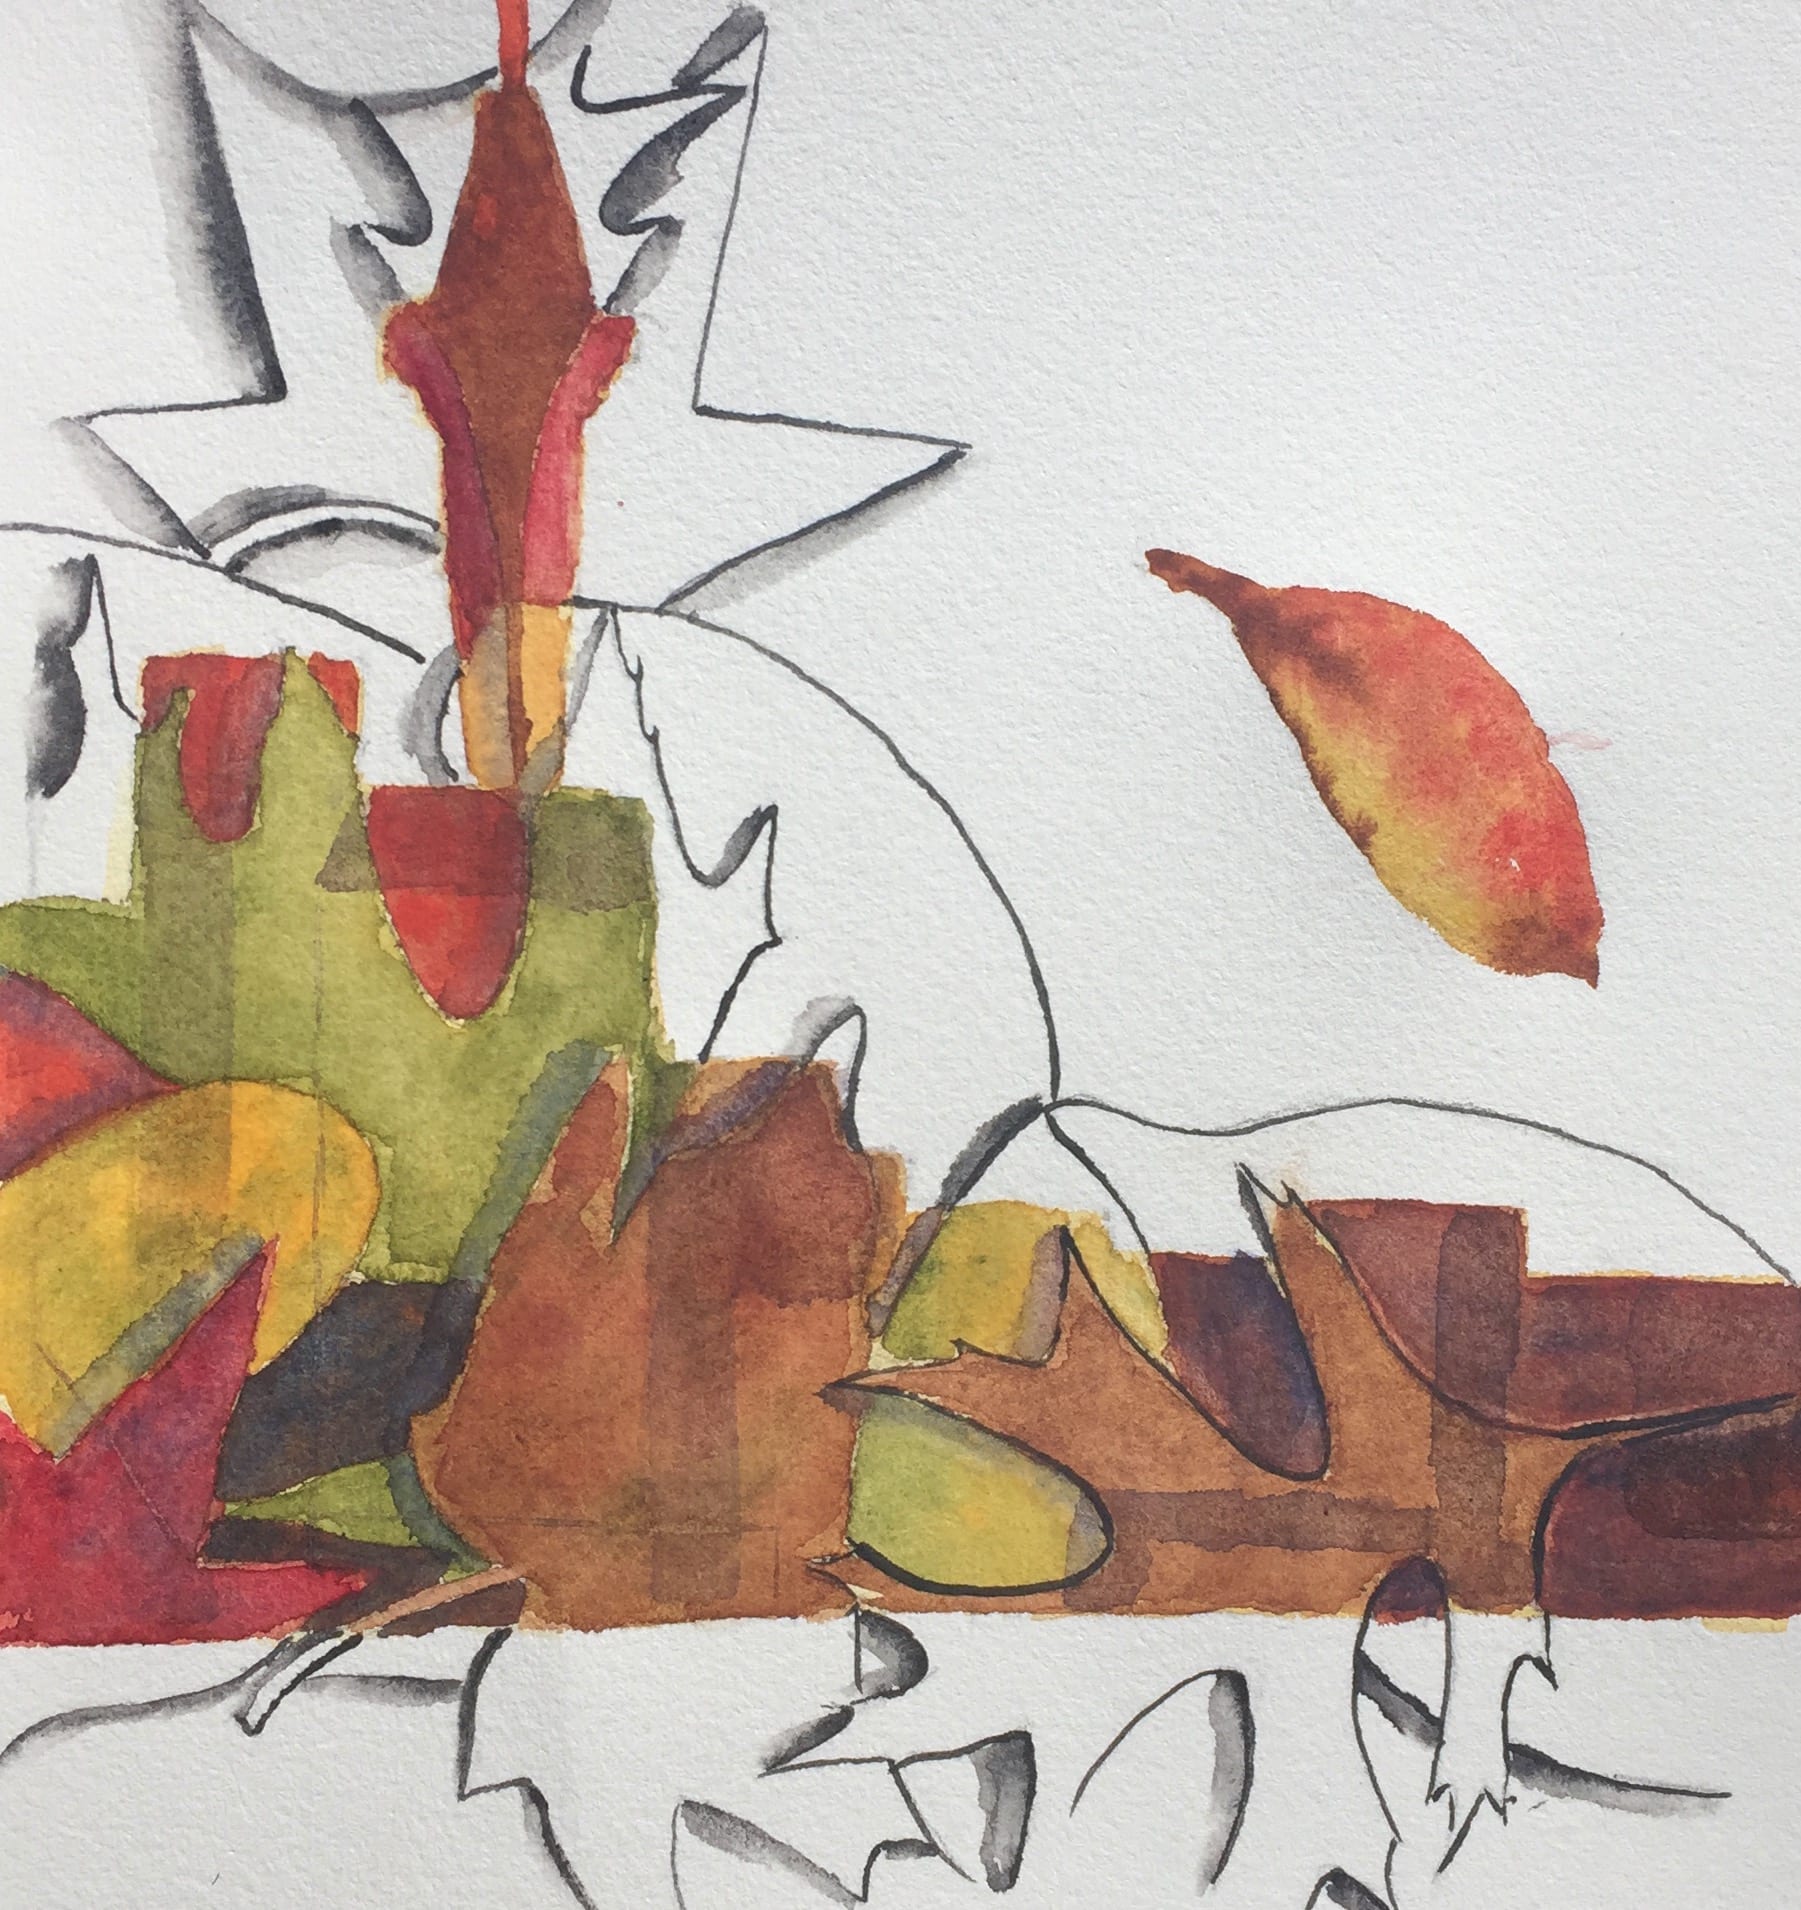
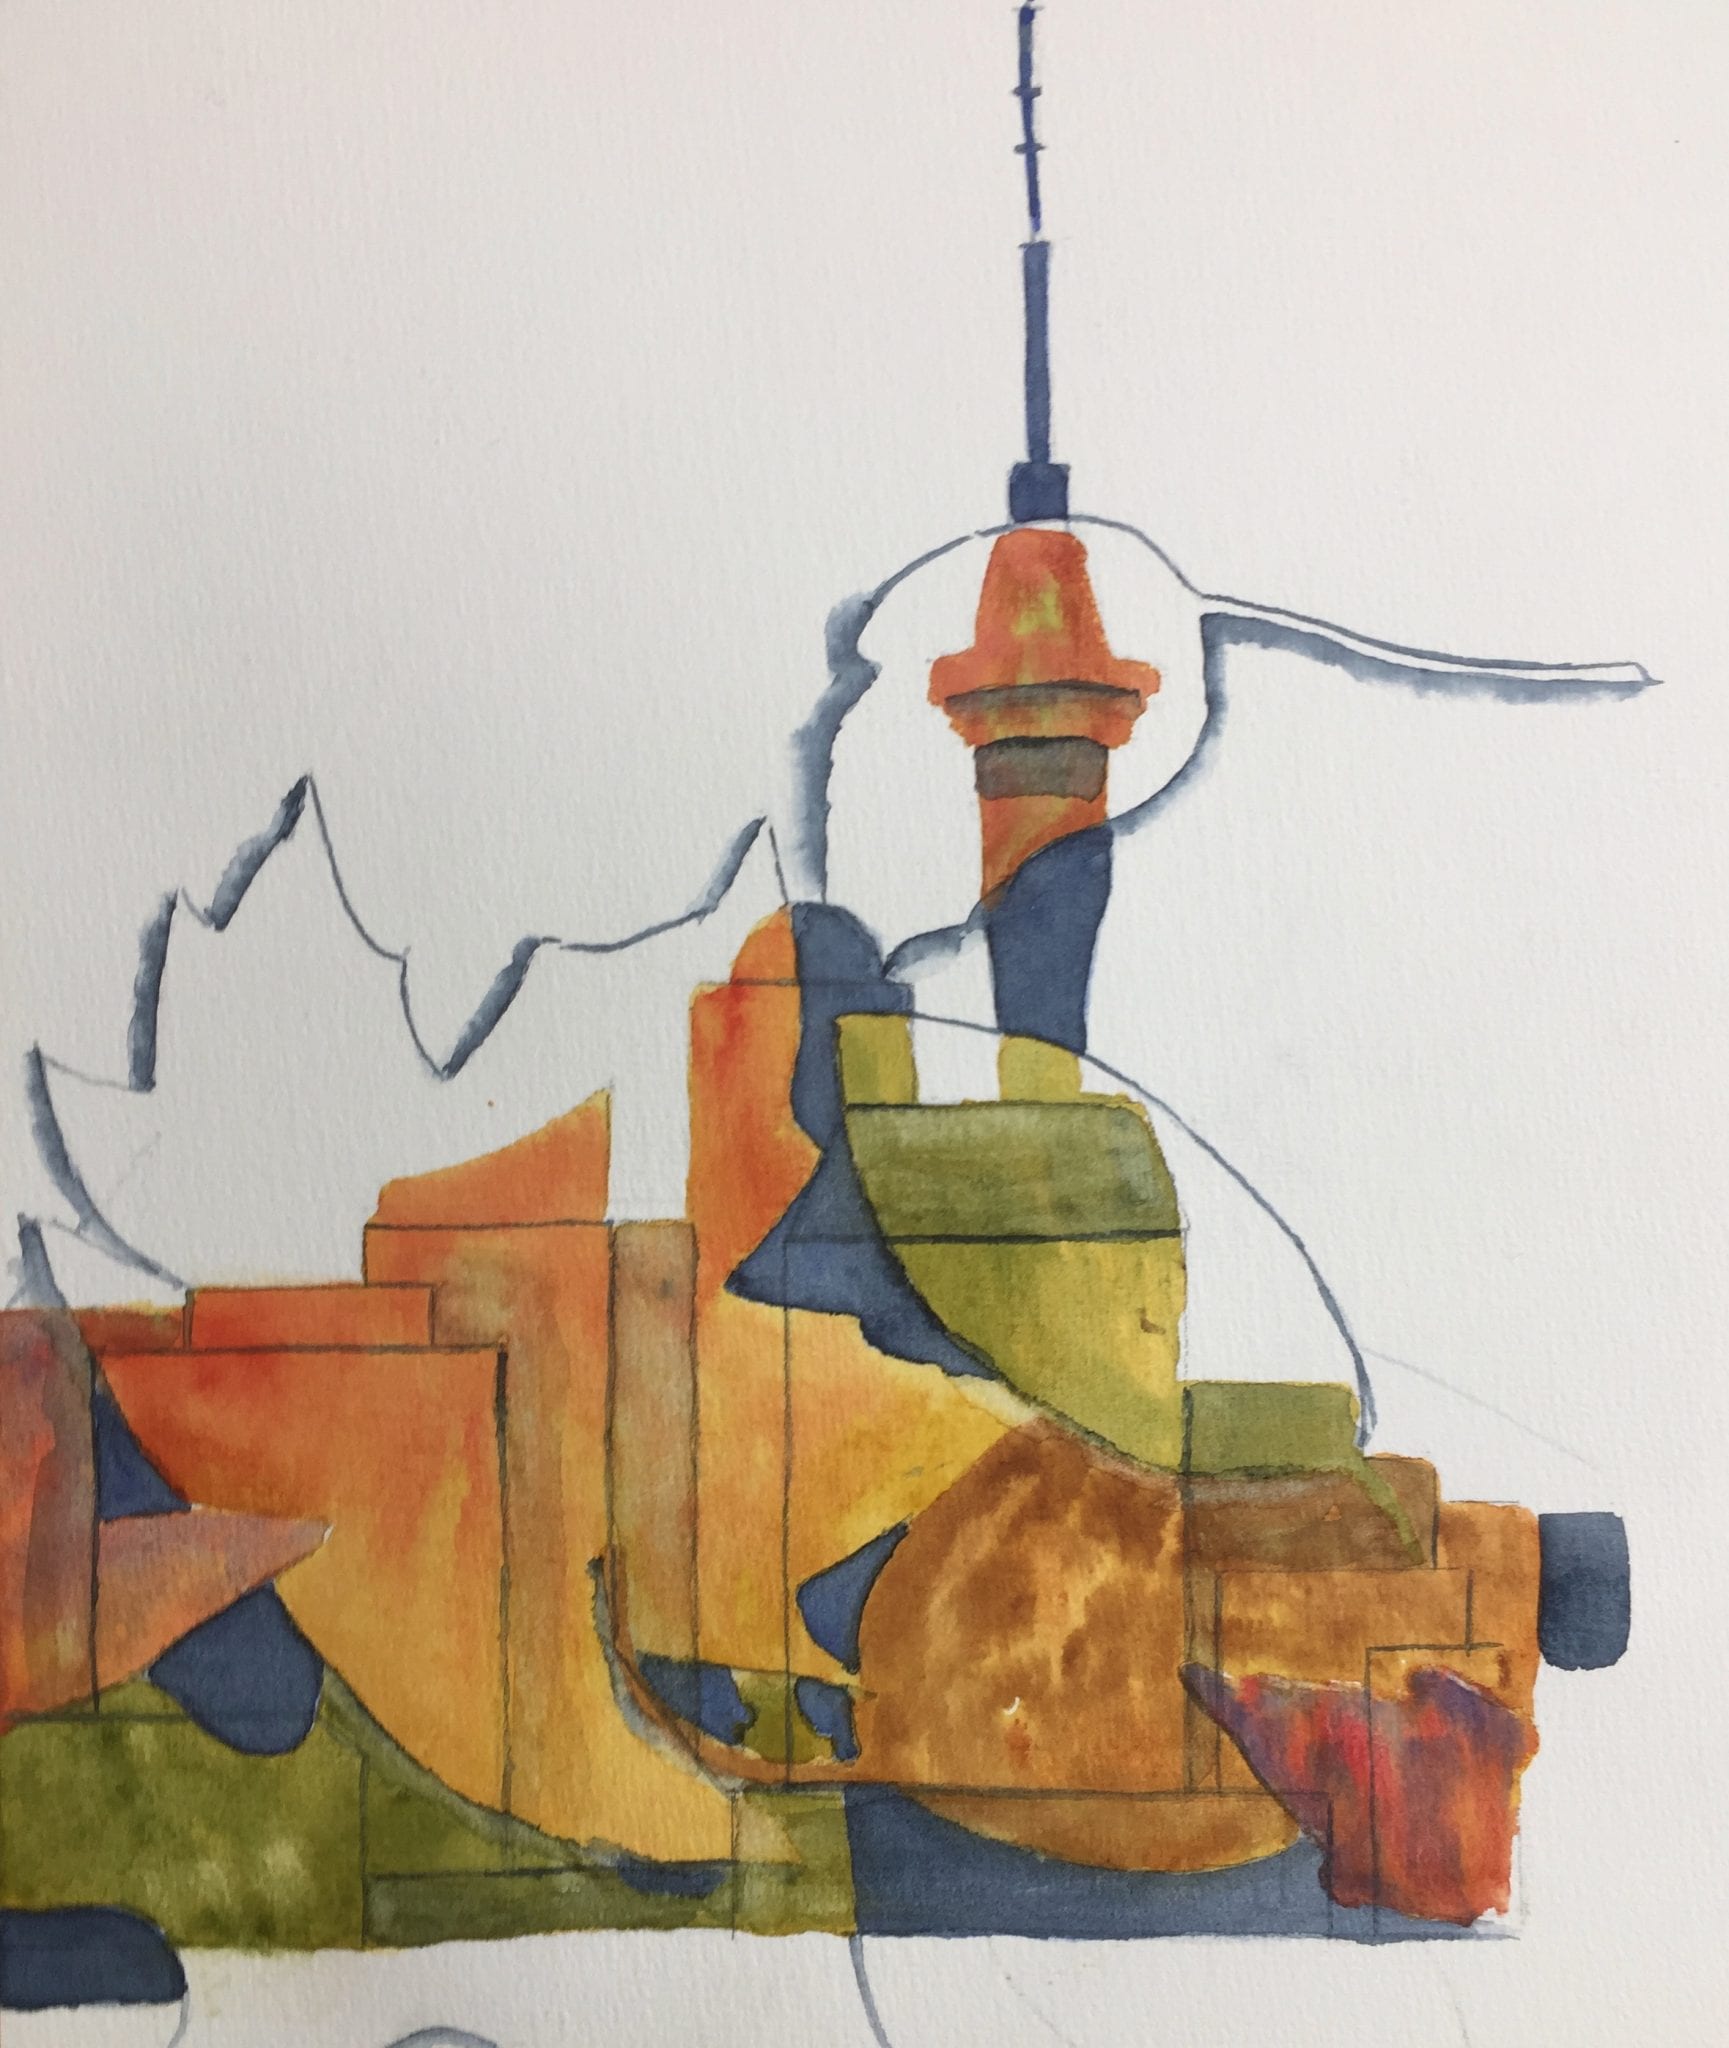
My next test painting was more around the individual leaves and city and I liked it a lot better. Only a few things needed tweaking (change leaves behind the tower and don’t use Indian ink).
Finally I was a happy and could start on my big painting.
Tip:
Use the same type of paper for your test paintings as for your final painting. Different types of paper can have surprisingly different effects.
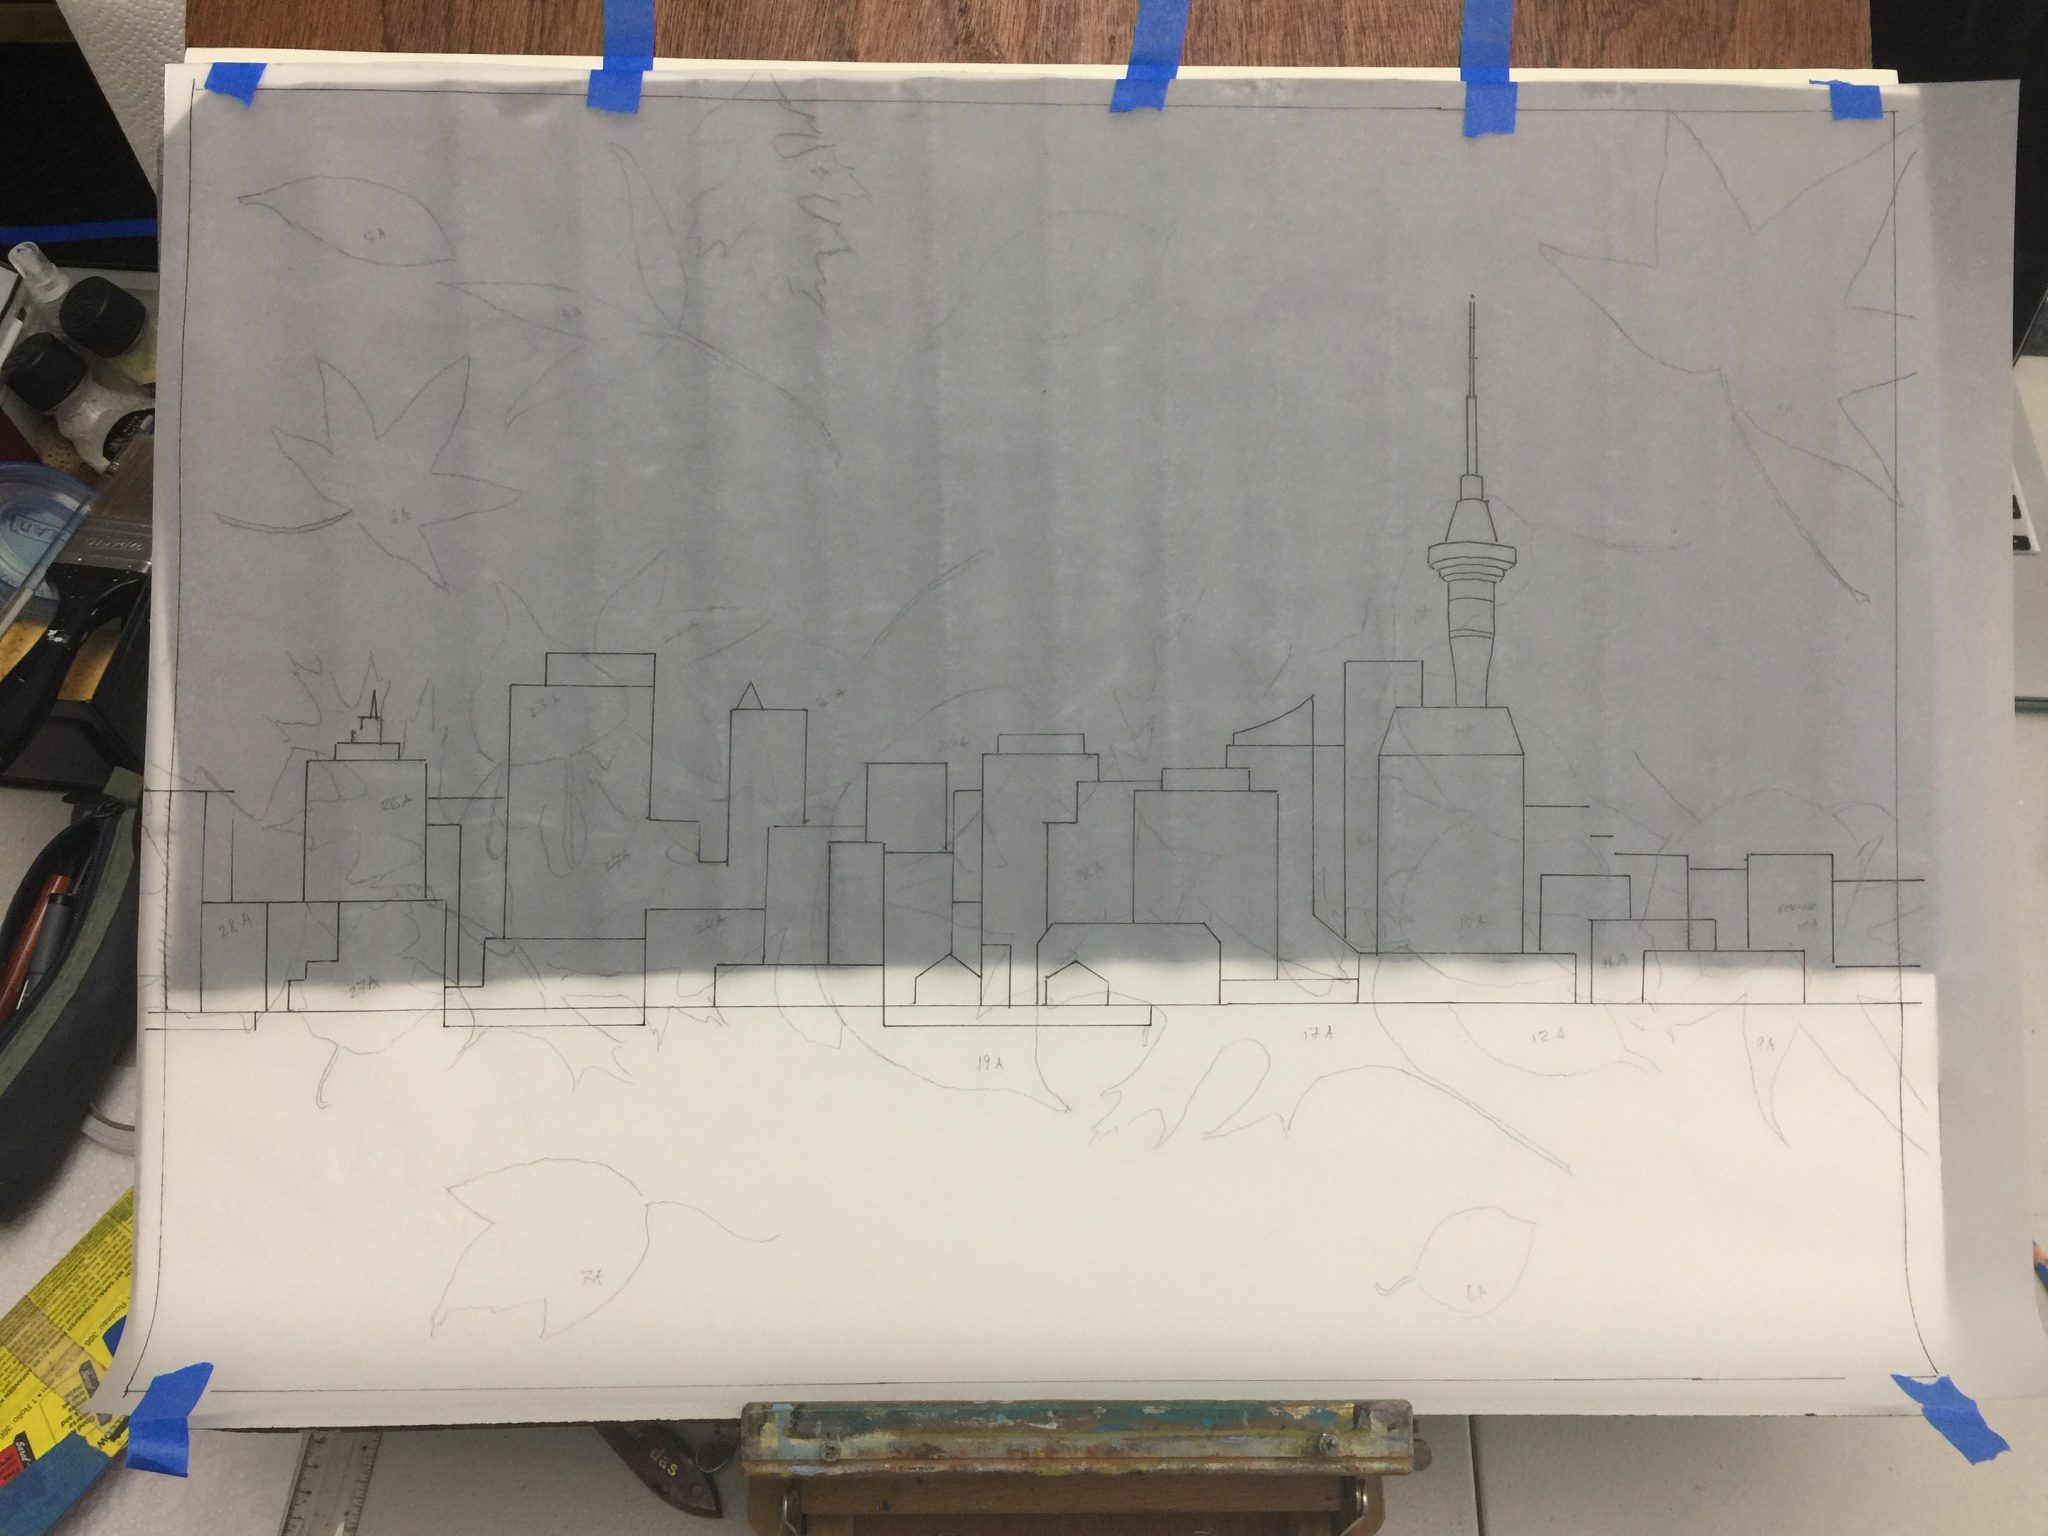
Tracing and Transfer Paper
If a painting is complicated, do the drawing on transparent tracing paper instead of your good watercolour paper. This will avoid drawing and erasure marks on the watercolour paper and keep the texture of the watercolour paper intact. Why use tracing paper instead of newsprint or normal paper? Sometimes you have to retrace certain areas in your painting and because tracing paper is transparent, it’s very easy to position it perfectly.
Good Quality Tracing Paper
I have a big roll of tracing paper from an art supply store and I can draw and erase on it beautifully. Unfortunately, I don’t have such good experience with individual tracing sheets, where erasing sometimes smudges more than it actually erases.
Good Quality Transfer Paper (Carbon Paper)
I use a roll of transfer paper from an art supply store, which lasts forever since I can re-use the same area again and again. The carbon marks on the watercolour paper erase easily and they are often absorbed well by the paint pigment. I found that carbon paper used in old type writers isn’t erased easily at all, so be careful with it.
Tips:
- Fasten your tracing paper with masking tape so it can’t change position.
- Try to keep your fingers off the carbon transfer paper while tracing since even soft fingerprints push through onto your watercolour paper.
- Use a coloured pencil to trace lines. This way you can see where you have already traced and were you haven’t. If you need to trace several times, change the colour.
- Erase any unwanted marks on you watercolour paper with a kneaded eraser, which is very gentle. Hard rubbing with a normal eraser can change the texture of your paper and it can show later when you paint over the area.
Colours, Technique and Materials
For my final painting I used the following colours (Winsor & Newton Professional):
- Raw Sienna
- Burnt Sienna
- Burnt Umber
- Cadmium Red
- Alizarin Crimson
- French Ultramarine Blue
- Paynes Grey
- Olive Green
Technique: Wet-on-wet, I wet the leaf area with clean water first and then gently applied the colours into each leaf. One layer of paint per leave was enough. The areas with Paynes Grey have two layers (dark blue on the buildings).
Paper: Arches, 18” x 24” (40cm x 61cm), cold pressed
As always, let me know if you have any questions. Until then – HAPPY PAINTING!
Nicole Russell